
The wire crimping process is vital in working with wire harnesses because poor crimping causes major connection failure, resulting in costly repairs and time-consuming diagnostic testing.
Keep reading for more information about the process.
What is wire crimping?
The crimping process entails using crimping tools to attach crimp-on connectors.
After inserting the stranded wire’s stripped end into a section of the connector, you can deform it mechanically by crimping (compressing) it tightly around the wire.
And the final connection should be gas-tight.
An effective crimp connection deforms the connector’s metal past its yield point, causing the compressed wire to exert tension on the surrounding connectors.
These opposing forces create high static friction that holds the cable in place.
Therefore, metals in the crimped connections have elastic natures, highly resistant to thermal shock and vibration.
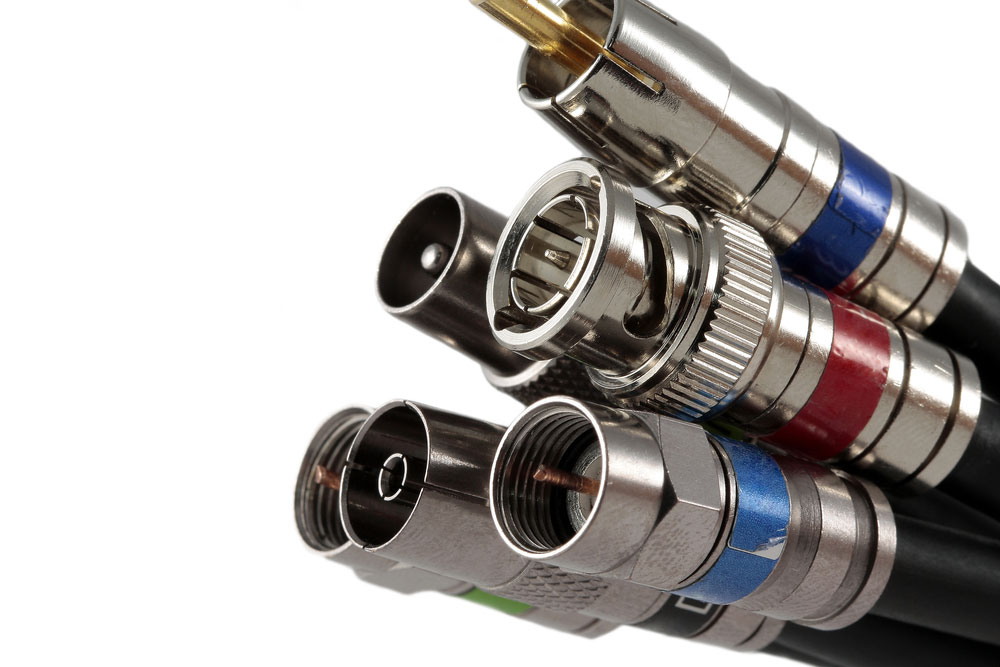
Coaxial cable connectors
Crimping vs. Soldering: Which is better?
Soldering and crimping are the techniques that produce a reliable, high-performance cable connection when used properly.
Each approach, nevertheless, offers some advantages.
Soldering
Soldering is the most economical and traditional technique of terminating wires.
It entails melting and cooling an alloy made of brass, silver, tin, or lead into solder cups to bond a contact to a wire conductor.
We recommend soldering for industrial and general-purpose applications that demand dependable power and signal connections.
The main advantage of soldering over crimping is that it is affordable because the soldering tooling is very minimal, and the only required materials are flux and solder.
Crimping needs specialized tools for the connection, while a basic soldering kit can terminate nearly any size of solder or wire contact.
Crimp
Crimping is applying pressure on a contact to attach it to a wire, which requires a crimping tool.
By squeezing the tool’s handle, you can crimp the wire and contact together by squeezing the tool’s handle to create a strong connection.
We recommend this method for applications that need high dependability in harsh environments.
The advantages of crimping over soldering include the following;
- It’s an easy, quick method that can perform manually or automatically using a crimping machine.
- The crimping process is more consistent and reliable than soldering, which may vary based on the skill level of the technician or method used.
- Crimping establishes an air-tight seal between the connector and cable, resulting in reliable, long-lasting connections protected from environmental conditions like dirt, dust, sand, and moisture.

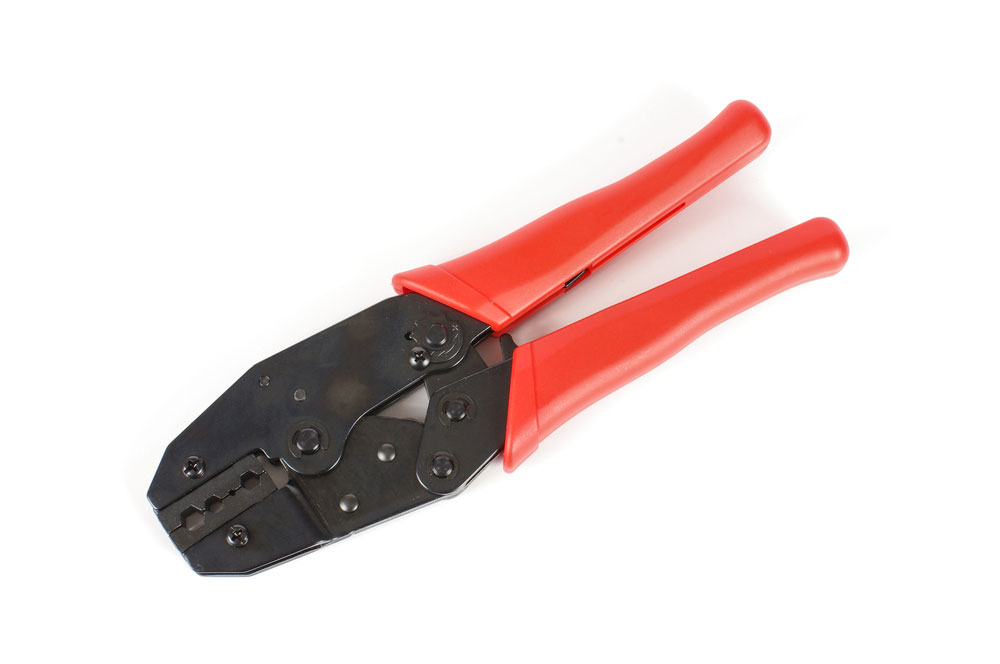
Manual crimping tools
Precaution for Wire Crimping Process
When crimping contacts or terminals onto a wire, you can read the specific application or connector tooling “Handling Manual.”
Crimping tools
Although there are various crimping tools, you should choose the tool designed to crimp your crimp terminal.
Alternatively, you can use a crimping tool with a ratchet design that accepts the crimp terminal.
Applicable wires
Ensure the application wires you plan to utilize are compatible with the chosen crimping termination before you start the crimping process.
As a general rule, tin-plated annealed copper-stranded wire is often the type of wire that you can use for crimping connectors.
Bare copper, shielded, tin-coated, solid, etc., are out of range.
However, you can use other wires if verified to be compatible with the selected crimping terminal.
Control Points for Crimping Operation
- Checking the application tooling: You should read each application’s “handling/operation manuals” and press the tool.
- Stripping wire insulation operation: Ensure you set the correct stripping length according to the terminal used, crimping method, wire style, etc. Then, carefully strip the insulation using a wire stripper without damaging the wire conductors.
- Crimping height: Crimp terminals without the proper crimp height can lead to poor conductivity. Therefore, you should measure the height of the crimp at the beginning, middle, and end of your crimping process.
- Crimped appearance: You should confirm the correct crimping condition by visually (using a loupe) checking the crimped appearance. Check the handling manual for every connector or terminal for the details.
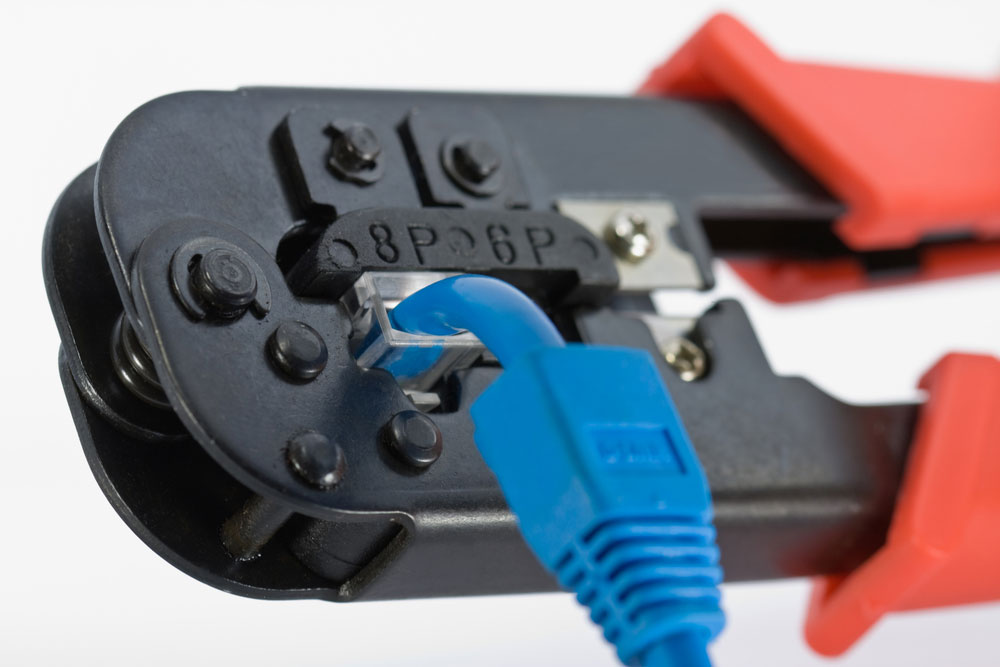
Crimp tool with RJ-45 connector
Applications of Wire Crimp
Crimp fulfills multiple applications, including termination of wires to blade terminals, wire splices, ring/spade terminals, screw terminals, or multiple combinations.
Single-wire crimp terminals
- Wire pin
- Butt splice
- Blade or quick disconnect (e.g., Lucar or Faston)
- Pin (SAE/J928)
- Bullet (e.g., Shur-Plug)
- Packard 56
- Ring tongue (slotted, offset)
- Flag tongue
- Multiple studs
- Hook tongue
- Spade tongue (long spring, short spring, flanged)
- Rectangular tongue
The Wire Crimping Steps
- Establish the wire’s length at the end.
- Cut and strip the insulation of the wire end to expose the strands.
- Clamp the sleeve over the crimp and wire, which is not supposed to cover the crimp’s terminal end.
- Insert all the strands into the crimp.
- Place the wire and crimp into your crimping tool.
- Then, cycle the crimping tool till it releases.
- Check that the wire and crimp are secured by removing the crimp.
- Use a hot-air gun to accurately and even apply heat shrink tubing.
Multipin connectors
Crimp is a common method to join wires to multi-pin connectors, such as modular or Molex connectors.
How to Crimp Rj45
- Strip the cable back 25 mm (1 inch) from the end. Please insert it into the stripping tool, rotate your crimping tool smoothly and evenly around the cable to create a clean cut, and tightly squeeze it.
- The cable includes several small wires twisted together that are supposed to be separated and strengthened to make them easier to sort into the right order.
- Arrange the wires in the right sequence using your fingers, allowing you to crimp them properly. The correct sequence from left to right is as follows;
| 1 | Orange-White |
| 2 | Orange |
| 3 | Green-White |
| 4 | Blue |
| 5 | Blue/White |
| 6 | Green |
| 7 | Brown-White |
| 8 | Brown |
- Cut the wires into an even line 13 mm (½ inch) from the sheathing. Hold the arranged wires with your index finger and thumb to keep them in order. Cut the wires into an even line using the cutting part of the crimping tool, wire cutters, or scissors.
- Insert the wires into the RJ-45 connector by holding the RJ-45 connector with the tiny metal pins facing up, and the clip is on the bottom. Make sure that each wire fits into the tiny grooves in your connector by gently inserting the cable into the RJ-45 connector.
- Squeeze the crimping tool’s handle twice after inserting the RJ-45 connector into the crimping portion. You should insert the RJ-45 connection with cable into the crimping area of your crimping tool. Then, squeeze the crimping tool’s handle to crimp the RJ-45 connector. Push down the pins by releasing the handle and squeezing the crimping tool again.
- Remove the crimped cable from the crimping tool and check if you pushed down all the pins in an even line. Then, gently tug at the RJ-45 connector to make sure the cable you attach the cable securely.
How to Install Molex Connectors
- Using a wire stripping tool, strip back enough wire. However, the length of the exposed insulation and the crimp zone, which measure 5mm, must not be exceeded by the amount of exposed wire. Hence, 2.5mm should be the optimal length for the exposed wire.
- Place the power connector, without the wire, into your crimping tool.
- Then install the wire into the power connector, clamp down, and release the crimping tool. You should also ensure you properly crimp the power connector onto the wire based on whether you are using Molex connectors that are female or male.
- Add the installed wires to the connector house. However, the wires’ orientation depends on the Molex wiring needed for your system type. The two available housing options are; Male Housing and Female Housing.
- When your crimp is faulty, the wire will come loose, or the power connector will pull out. Therefore, you should re-crimp the wire and check the crimping before inserting wires into the connector housing. The hooks on the power connectors latch into the connector housing. Therefore, it will be hard to remove once you install (insert) the wire into the connector housing.
Coaxial connectors
Alternatively, to soldered connections, you can use crimp connections to attach connectors to coaxial cables quickly.
How to Crimp Coax
- Using a sharp wire cutter, cut off the end of your coax cable, and make a squared-off surface. Then, mold the ends of the cable using your fingers into a cylinder.
- Insert the cable into a stripper tool. Ensure you guide the end of your coax cable on the stripping tool or flush it against the wall for the correct stripping length.
- Clamp the stripping tool close around the coax. Spin the stripping tool smoothly around the coax cable 4-5 times or till you stop hearing the sound of metal being scored. Avoiding applying any force that can pull on the insulation coating.
- Remove the coax stripping tool. Once the stripping tool makes two cuts, please remove it. Using your fingers, gently remove the material closest to the cable’s end to reveal the bare center conductor. Then, using your fingers, carefully remove the outer insulation you cut free to reveal a layer of foil.
- Tear off the revealed foil to reveal a layer of the metal mesh.
- Use your fingers to bend back the revealed metal mesh. However, Don’t tear the layer of foil under the metal mesh. Instead, leave it intact around the inner insulation. Therefore, you should bend back the mesh to mold it over the outer insulation’s end.
- Place the coax’s end into the F connector’s back. The whiter inner insulation should press against the front flange of the F connector.
- Therefore, if you can see the insulation, you should keep pushing the coax and F connector together.
- However, it would be best not to twist your coax in the F connector’s body.
- Crimp the connection using a crimper. Put your F connector into a coax crimping tool. Then, completely squeeze the handle of the crimping tool and release it. Now, remove the crimped connection from the tool.
Coaxial cable crimping tool
Conclusion
A proper wire crimping process ensures secure cable connections. For more assistance with wire crimping, contact Cloom today.